OLED Display Information
General Notes
OLED displays have an unavoidable process of wear and tear. To ensure that the OLED displays last as long as possible, use the instructions in this document.
Do not use maximum brightness
Maximum brightness of console surfaces is not recommended to use, especially for a longer time. You should use maximum brightness only when necessary due to environmental conditions (e.g., outside broadcasting). Always keep in mind, that OLED displays running on maximum brightness will wear and tear very fast and will not last very long.
Use Standard or Dimmed illumination levels as default instead. On control surfaces that do not support illumination levels, use Auto Dim to set standby.
Important
In older firmware versions, default illumination level is always maximum brightness. OLED displays will not last very long under these conditions. Make sure to use a firmware version which supports illumination levels. See Brightness Settings below.
Enable auto dim or standby
For times when the consoles are not in use for a longer time, enable Auto dim functionality. This will dim or switch off the surface after a certain time of inactivity. You can define the timing, when the control surface will dim or switch off. Use this function for studios that are not in use the full day, for example to switch off the control surface at night.
Use brightness keys
Brightness keys allow the user to change surface brightness to a defined value. Brightness can be separately applied to TFTs and to console surfaces (including OLEDs and push buttons). With this solution console brightness can additionally be adjusted on demand. Also use brightness keys in combination with auto dim functionality.
Brightness settings
Toolbox software supports adjusting default brightness levels. Also auto dim / stand by mode for surfaces is possible.
Firmware version 8.x & Toolbox8
Console illumination features are supported with all Versions of TB8 and firmware version 8.x. See Console Illumination for information on setting auto dim and default brightness levels. See Console / Key Functions for information on how to set up brightness keys.
Firmware version 7.4 & Toolbox5
Since Firmware Version 7.4.34 console illumination and auto dim is possible for Series 52 devices using firmware version 7. Consider an update to this version. See Firmware update recommendations
See Console Illumination for information on setting auto dim and default brightness levels. See Console / Key Functions for information on how to set up brightness keys.
OLED display exchange
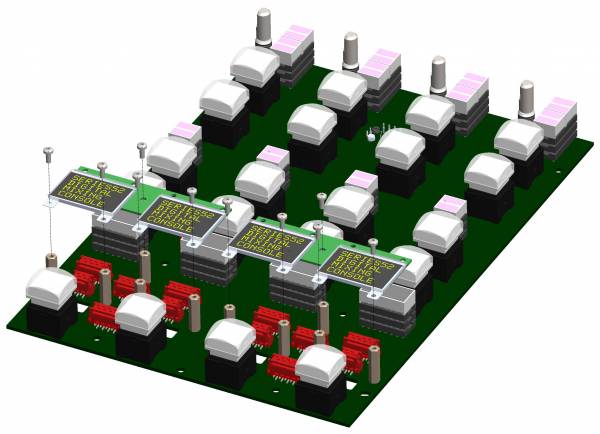
Exchanging OLED displays on all DHD Modules is possible.
Note
For getting spare parts and before exchanging the OLEDs always contact your local DHD distributor first!
52/SX fader modules
Exchange on 52-1020A, 52-1021A, 52-1024A, 52-1025A
- Remove encoder knobs and housing.
Screw: 14 pcs countersunk M2x4,
Tool: Torx T6
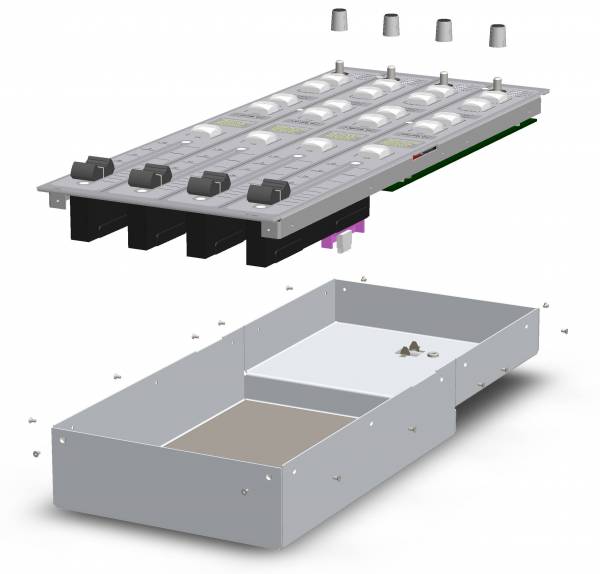
- Remove main PCB from front panel.
Screw: 11 pcs (52-1020A, 52-1021A) or 9 pcs (52-1024A, 52-1025A) hexagon button head screw M3x6,
Tool: Screwdriver Hexagon 2mm
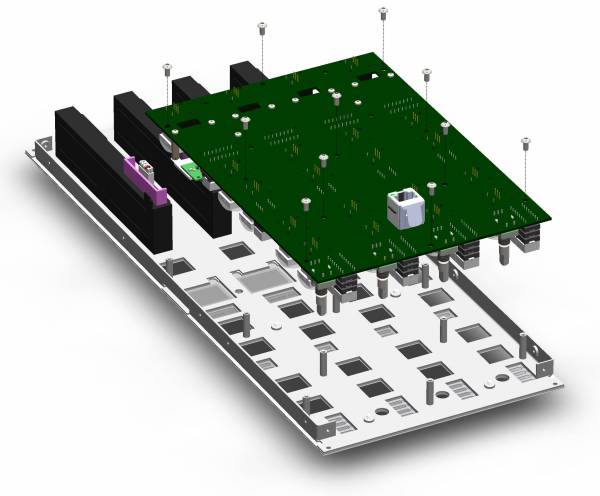
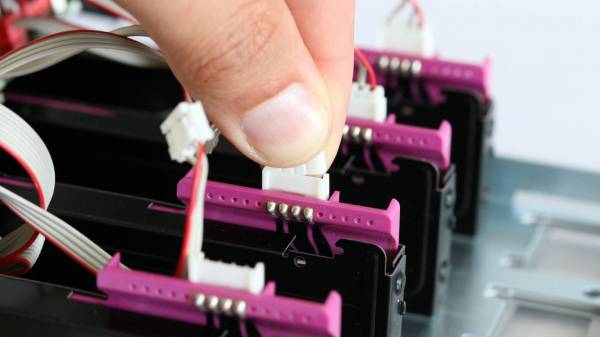
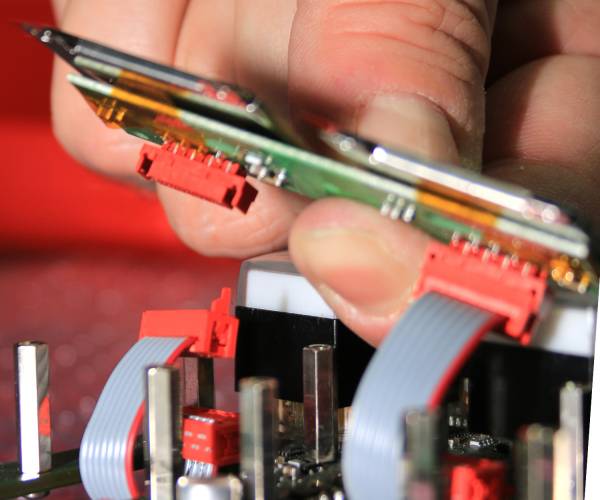
- Disconnect the cable connector at each fader
- Remove srews in OLED boards
Screw: 10 pcs button head screw M2x5,
Tool: Torx T6
WARNING
Do not touch the green flex-PCB areas at the OLED diplays. Only use the solid base PCB to handle the OLED module.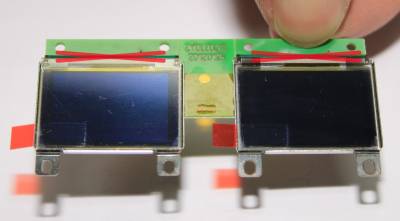
- Disconnect the flat-ribbon cable connectors.
Important
Before reassembling the main PCB to the housing, remove the protective foil on the OLED displays.
To reassemble the module, follow these instructions in reverse order.


