SNMP Overview
The DHD firmware is able to provide SNMP commands via an external PC. The DHD SNMP Software 52-8591 enables SNMP Support for DHDOS and is related to a single DHD device.
To send SNMP commands, the mixing console has to be connected via ethernet to a PC, on which the DHD Operation Server and the DHD Operation Manager is running. This PC-Software provides the SNMP commands.
brief description:
At the moment, only the SNMP commands “Get” and “GetNext” are implemented.
The following conditions are available by default:
- power down master/slave
- wetness alert
- temperature alert
- synchronisation source 1/2
- 44.1 kHz / 48 kHz
Further conditions can be defined in the DHDOM (maximum of 20).
Any information defined in the mib-file are read-only and can not be set.
Each SNMP condition is able to send a “trap”.
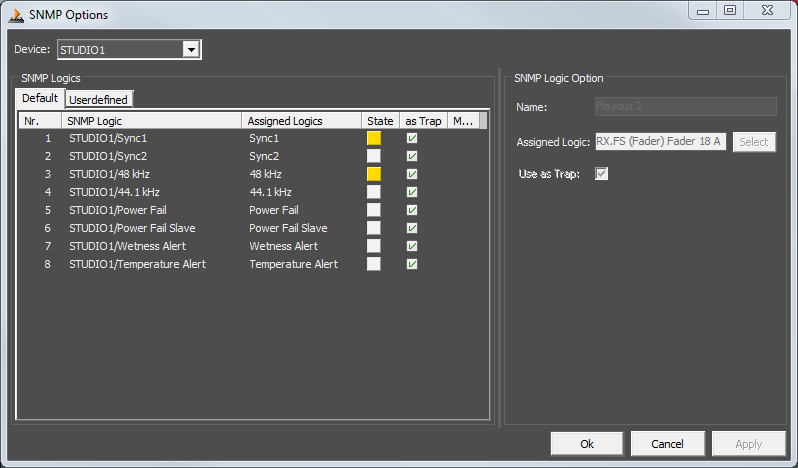
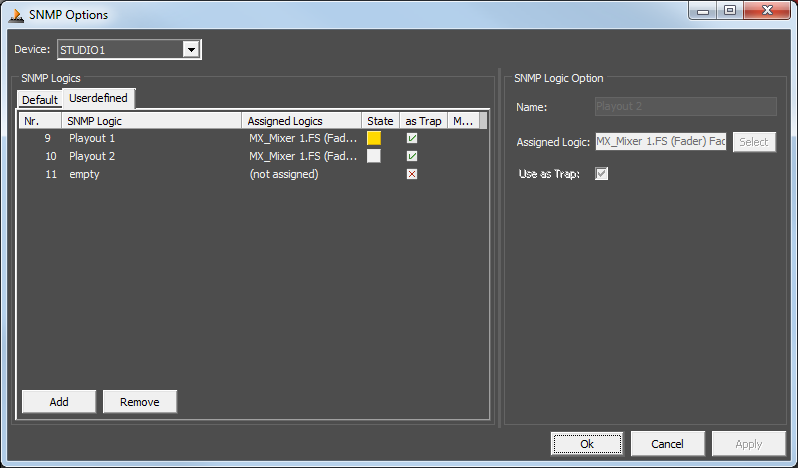
The following screenshots show the SNMP option in the DHD Operation Manager:
Set up
To set up SNMP, installing the DHD SNMP Agent is required. This software allows DHDOS to communicate via SNMP.
The mib files are defined and created directly at DHD. Contact DHD if required.
Configure
For further configuration, go to Adminiatration / SNMP Options. The SNMP Options window opens.
First, you have to select the device you want to configure.
In the SNMP Logics area you see and define logics for SNMP monitoring. In the SNMP Logic column, the SNMP logic name is defined and shown. The Assigned Logics column shows which logics are assigned to the SNMP logic function. The State column shows the state of the logic:
- Yellow = true
- Gey = false
The As Trap column shows if the logic will send a trap when it changes or not.
The Mod. column shows with a * entry if the logic was modified.
In the Default tab, all predefined system logics are shown. You can only rename them and set if they are allowed to send traps or can only be requested.
In the Userdefined tab you can use user-defined logic sources.
To create a new user-defined logic click Add. To remove existing entries, select the entry and click remove. To change settings of entries, click the entry you want to edit in the list.
You can change following settings in SNMP Logic Option area:
Name: Enter a name of the logicAssigned Logic: Assign a console logic from the logic tree to the SNMP logic. ClickSelect. TheLogic Sourceswindow opens. In the tree, select the logic you need. The logics displayed here are the same as displayed in TB8 (See TB8 / logic sources window and TB8 / General information on logic for more information). When you selected the correct logic by clicking, you can invert the logic state by checkingInvert Logic Level. ClickSelectto select and close the window.Use as Trap: Set if the logic sends a trap when it changes or not.

