Channel Assignment
In this subsection, you can assign the fader channels to the physical faders of the configured fader modules.
Important
You should assign at least one fader channel to every physical fader.
If not, the physical fader is not included in the DSP fitting. During operation, you can not assign a fader channel to a physical fader, which has not initially assigned any fader channel.
You can assign each fader channel to a physical fader as long as you don't exceed the maximum number of faders. If you have configured a key on the console to toggle between Layer A and Layer B, you can use this key to toggle between the primary and secondary function for all physical faders with two configured layers.
Important
You can configure a maximum of 16 faders in a maximum of 2 layers.
If you have a 16 fader console surface, you can assign all of the 16 faders possible on only one layer.
If your console surface has 10 faders, Layer B can only have 6 more faders assigned.
You can access the settings for both layers by selecting the Layer A and Layer B tabs. The available settings are identical for all layers.
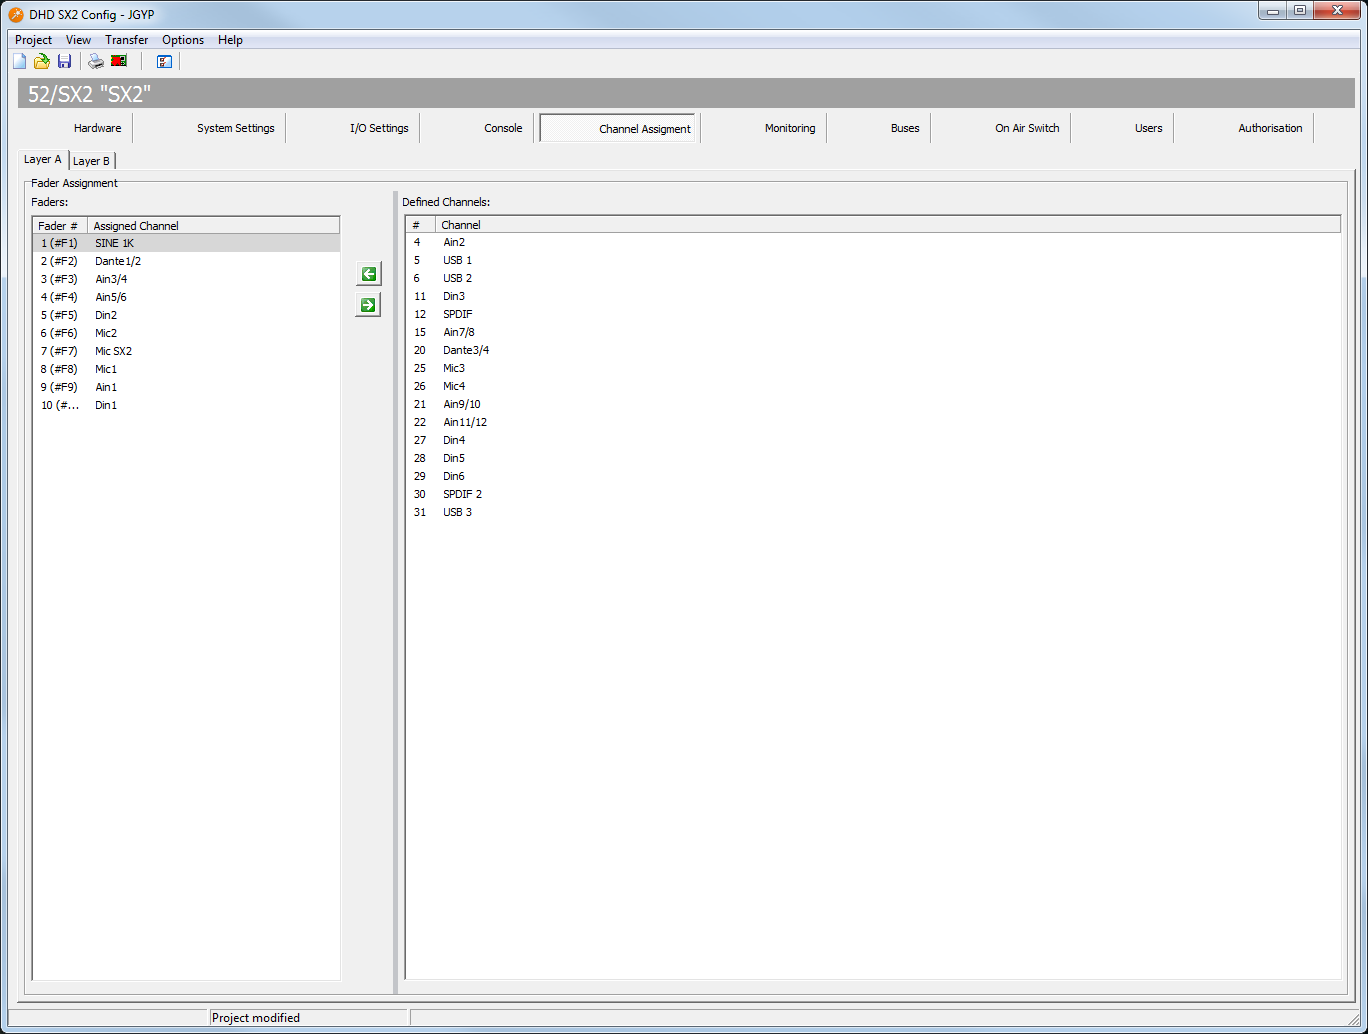
Fader Assignment
The faders of the console are numbered 1…X. The left fader in the console is number 1, the fader to the right is number 2, and so on.
In this section, the default channels are already assigned.
A Channel can be either an Input (as defined in I/O Settings) or a standard internal mixer channel that comes with every configuration (e.g. SINE 1K). To change channel Labels, go to the I/O Settings page.
"Faders" List
The column Fader # shows the Fader number on the Surface. The column Assigned Channel shows the assigned channels.
"Defined Channels" List
The column # shows the internal Fader Channel ID. The Channel column shows the name of the channel.
Changing Assignments
Note
Here you can change the standard assignment of the channels. This assignment will always be loaded when the configuration is sent to the device or if no Snapshot 0 exists. For more information on Snapshot 0, see Maintenance.
Note
You can always change the assignment live on the console using Access keys and the Sources list on the Input page. Channel Assignment can then be stored in Mixer Snapshots.
You can change the order of the assigned channels. In the Faders table, drag the channel you want to move and drop it on the new fader you want to have it. The channels will be swapped.
You can also change the standard assignment of the channels. To do so:
- Drag the designated Channel from the
Defined Channelslist to the designated fader on theFaderslist. - Alternatively, you can use the Arrow keys between the Tables.
- Select the designated Fader
- Select the designated Channel
- Press the arrow left
 key to replace the fader
You can also remove a channel from the list. To do so:
- Select the fader you want to clear
- Press the arrow right
 key to clear the fader
Important
You should assign at least one fader channel to every physical fader (in at least one layer).
If not, the physical fader is not included in the DSP fitting. During operation, you can not assign a fader channel to a physical fader, which has not initially assigned any fader channel.
When you send the configuration to the device, the new assignment will be used.