Project Information
When you click on <Project> Node (Default name for each new project is New Project) in the project tree on the left, the Project Information tab opens.
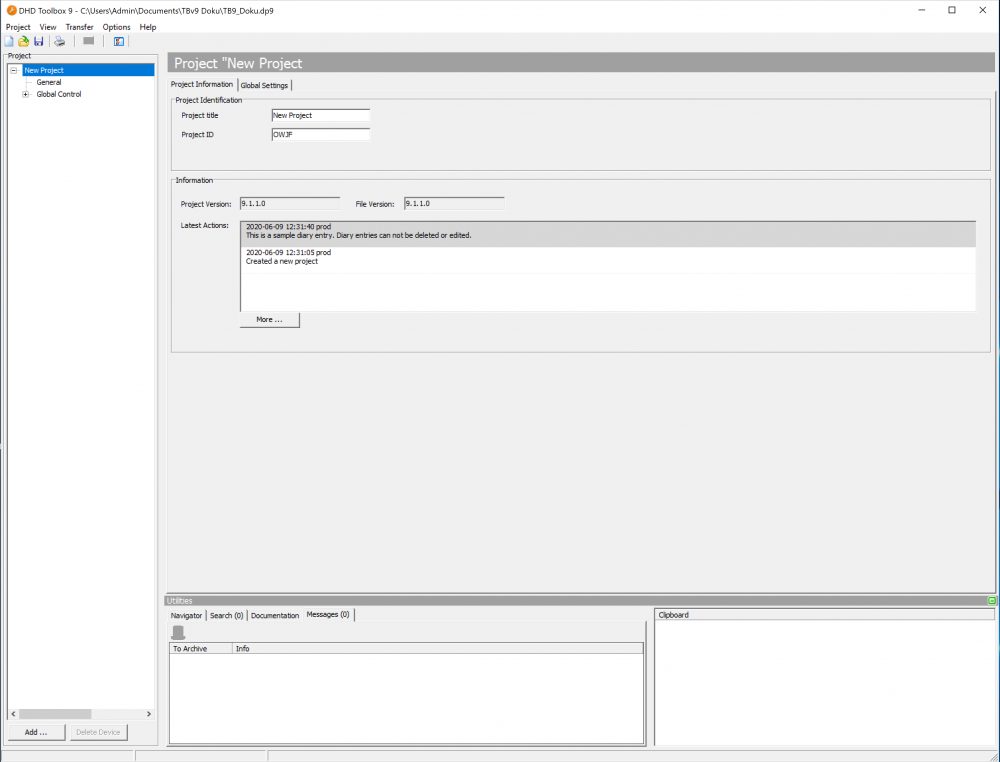
Project Identification
In the Project Identification area you can set the Project Name with up to 26 digits length and Project ID, up to 4 digits.
Default Project Name is New Project. A new project will have a random generated project ID. You can change it to your needs.
Warning
If you have multiple DHD projects in the same network, make sure not to use the same Project ID for multiple projects. This may cause doubled Logic IDs, package loss and other unusual behaviour.
Information
In the Information area, you see information about the project version and file version (matching to used Toolbox version).
Latest Actions shows the last entries into the History. You can see the full history and add entries with the More … button.
History
Using the History function in the Project menu of Toolbox, you can log modifications of the configuration. This way, you can reproduce later on, which user made which modifications of the system at which time.
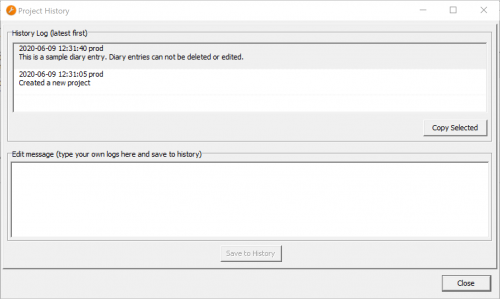
In the Project menu click History; the Project History window opens. In the History Log area, the single entries are shown with date and time, as well as the login name of the user (Microsoft Windows Login) who created the entry. Toolbox itself logs some processes, for example when and by who a configuration was originally created. Other changes that seem important to you can be inserted manually.
To do this, in the Edit message area, enter the new message and click Save to History.
Note
A history entry can not be changed or deleted, once the entry was saved.
Project

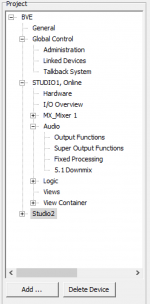
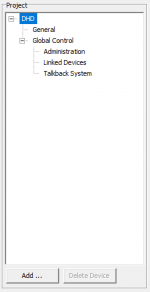
The Project area on the left-hand side of the Toolbox main window shows the project tree. This provides the configuration information in a tree-structure. This project tree shows general options (see General Settings) and device specific options (see Device Properties) in each node. The devices are shown with their appropriate names.
In front of the Global Control node and the devices you can see a plus symbol. This symbol indicates a node with subsections. Click on a plus symbol to get access to different parts of the configuration.
To navigate through the project tree use the left mouse button, some functions can also be accessed using context menu by pressing the right mouse button.
To add a new device to the project click Add at the bottom of the Project area or use the context menu.
If a device is selected, you can remove it by clicking Delete Device or use the context menu.
Sections in the project tree, which can be renamed by the user, for example a mixer, are written in this manual in angle brackets < and >. A typical path in the project tree is for example <device>/<mixer>/Fader Channels.
Context Menu
Right-click in the Project area to see the context menu.
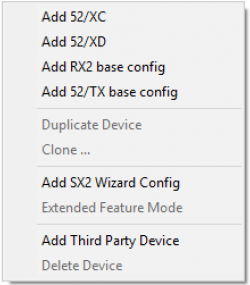
The Duplicate Device and Clone ... options are available when you click on a device node.
The Extended Feature Mode is available when you click on a 52/SX Config or a 52/DX Config.
Add 52/XC
Select Add 52/XC and a 52/XC2 core (52-7420) will be added as new device with its own node (Device_1…n) to your project. You can change the core type in the Units Options area at the Hardware node.
This device can be used with all Series 52 control modules (52/MX, 52/RX, 52/SX, 52/DX, 52/TX)
Add 52/XD
Select Add 52/XD and a 52/XD2 core (52-7440 with 52-7456) will be added as new device with its own node (Device_1…n) to your project. You can change the core type in the Units Options area at the Hardware node.
This device can be used with all Series 52 control modules (52/MX, 52/RX, 52/SX, 52/DX, 52/TX)
Add RX2 base Config
To add an RX2 bundle to your project file select Add RX2 base Config.
A preconfigured XC2 (52-7423) based device will be added to your project. You can change the core type on the Hardware tab and there in the XC2 Core area.
Add 52/TX base Config
To add a 52/TX bundle to your project file select Add 52/TX base Config.
A preconfigured XS2 (52-1830) based device will be added to your project. You can change the core type on the Hardware tab and there in the XS2 Core area.
Add SX2 Wizard Config
To add a SX2 Wizard Config to your project select Add SX2 Wizard Config.
While the base configs above are regular configs that are already configured, the SX2 Wizard Config is a simpler version of a Toolbox configuration. For more information see SX2 documentation.

Extended Feature Mode
The Extended Feature Mode is available when you right-click on device node created with the 52/SX Config or a 52/DX Config.
This Extended Feature mode opens the configuration of preconfigured 52/SX or 52/DX devices. Each settings node of the device will be shown the configuration can be continued like with 52/XC2 or 52/XD2 devices.
To load this configuration into a 52/XS or 52/XS2 core the 52-1950 license is required for this core.
Important
Without “52-1950 XS Core extended feature upgrade” license in the core the configuration can not be loaded into the device.
Warning
The Extended Feature Mode can not be reversed to the default configuration created with the 52/SX Config or 52/DX config.
Add Third Party Device
Add Third Party Device adds further devices to the project, which the DHD mixing and routing systems are able to communicate with. These devices can not be configured using Toolbox8.
Delete Device
Click Delete Device to remove a selected device from this project file.
Duplicate Device
To create a copy of a device, for example for an installation with almost identical studios, right-click on a device in the Project are and select Duplicate Device from the context menu.
Now the Toolbox creates an editable copy of the selected device with configuration settings you already made. From now on the copy is an device with its own configuration that can be adapted further on.
Tip
Use this Duplicate Device feature instead of exporting a device and then importing the device again.
Clone
In an installation with many independent and identical consoles, for example edit booth or journalist desks the configuration of these devices can be simplified by using the Clone tool.
Tip
These cloned devices will always have the same configuration as the original device.
The cloned devices can not be configured independently.
- Right-click on a device in the
Projectarea and selectClonefrom the context menu. TheAdd Cloned Deviceswindow will be shown.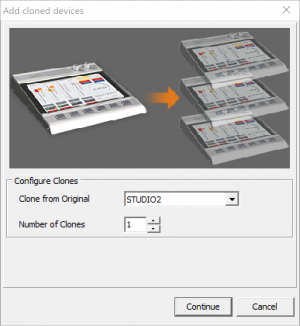 Add Cloned Devices window
- In the
Configure Clonesarea, select a device from theClone from Originallist that should be the source configuration for all clones. - Select the number clones that should be created.
- Click
Continue.
The Toolbox adds device clones as separate nodes to the project tree.
The cloned devices are named Dolly_1..n. Select the device to change device parameters like Device Name or Original Device on the Options tab.