View Types and Options
In the project tree, in the subsection <Device>\TFT Views, you can create different views that are shown on the TFT displays.
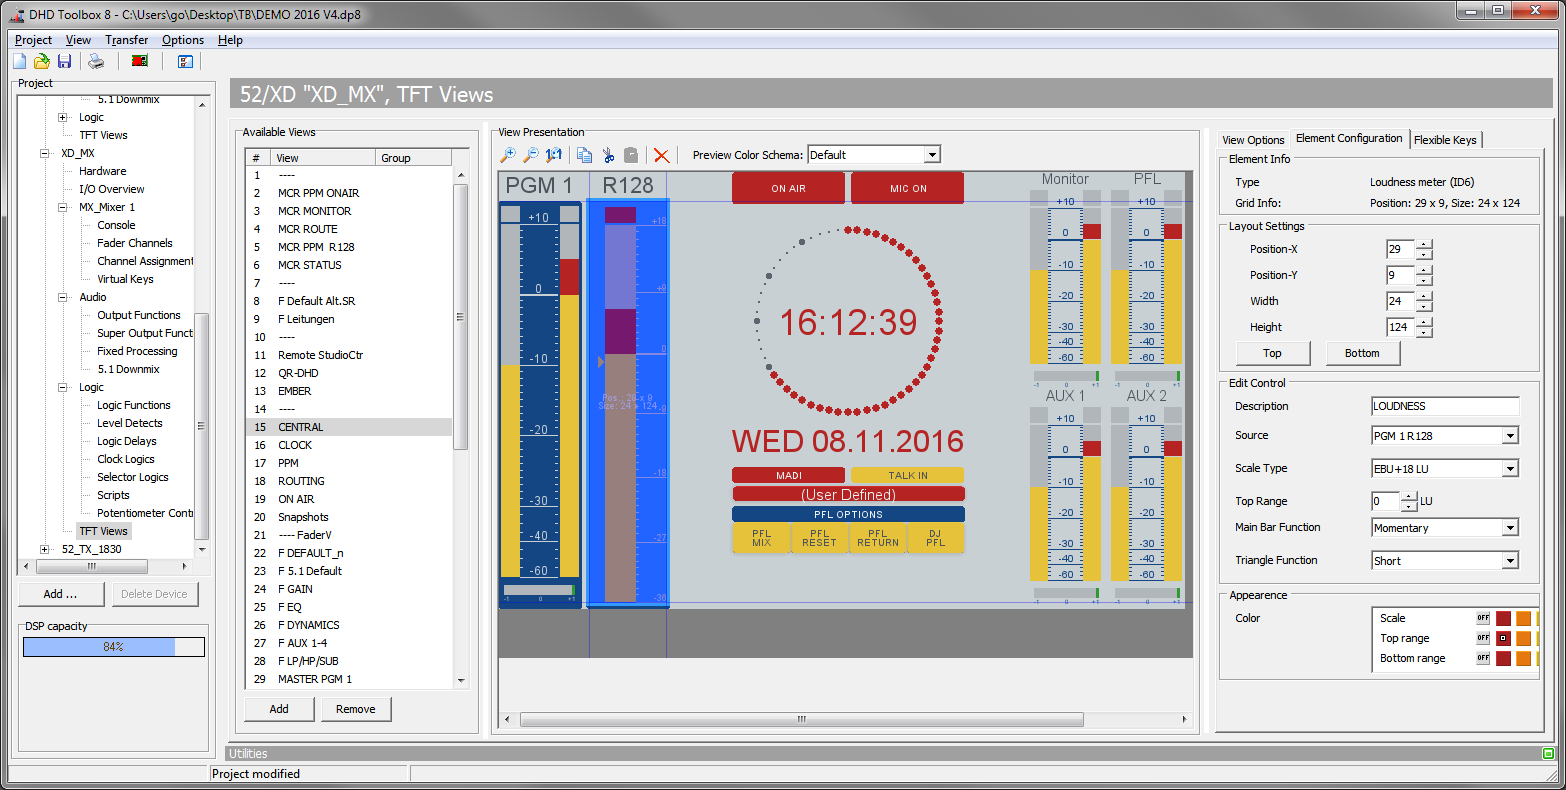
We differentiate between displays that are assigned to channels and displays reserved for controlling and monitoring tasks. The displays hardware is identical, so they just differ in their configuration. They are called fader views and master views in TB8.
Important
This documentation is valid only for devices with the new multi-touch IPS TFT displays (52-4010, 52-4018, 52-1156 (52/TX) and 52-1114 (new 52/DX)). Old TFTs will show a compatibility mode and display the grafics with the old engine. Editing views for compatibility mode remains the same procedure just like working with new TFTs.
For more information on old TFT views and old view engine, see Toolbox5 Documentation.
View Types
For fader views and master views, you can use the same type of TFT display and operating elements (the timer function is the only one that is only applicable in a master view). Only the possible arrangement of the elements differs a bit.
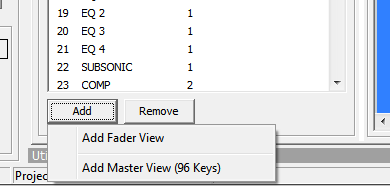
Add to choose between Fader View and Main ViewFader View
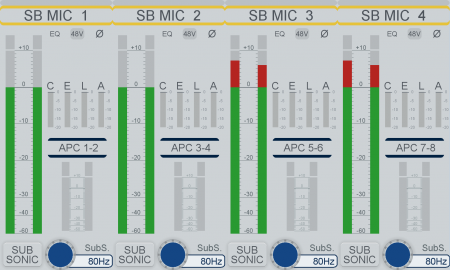
For configuring a fader view, you can use the normal height of your TFT, but only a part of the width of a TFT display. This is because 4, 5 or 6 fader modules correspond with the image width of a TFT display, therefore up to 6 fader views are shown next to each other.
Note
52-4018 TFTs only support 4 Fader Views. 52-4010 TFTs support 4, 5 or 6 Fader Views.
To add a new Fader View, in <device>/TFT Views click Add in the Available Views area. Select Add Fader View.
A new Fader View is created which is smaller than a master view but has the same height. This view will be repeated for any channel with a configured Fader View.
In the View Options area on the right hand side, under Preferred display type, decide which kind of view it is.
4015 Fader Viewis only kept for compatibility.4018 Fader Viewhas always 4 Fader Views.4010 Fader View (4 Fader)is the default for a 52-4010 TFT.
Tip
If you are not sure if your firmware version supports more, this will always work.4010 Fader View (5 Fader)has 5 Fader Views.4010 Fader View (6 Fader)has 6 Fader Views.
Note
Using more than 4 Fader views on a 52-4010 TFT requires at least Toolbox8 v8.1.6 and Firmware v8.1.7.
You can now start editing your Fader View just like a master view. If you want your TFT elements to act on the assigned channel to the fader view, select act with Access.
On <device>/<mixer>/Console make sure you configured your TFTs correctly. On the console layout, right-click on the TFT you want to have the fader view. Select Module Mode and select its starting fader.
To make a Fader View standard for all channels of a pool, right click it in the Available Views area. Select Make default for channels of pool and select the pool you want.
To make a Fader View standard for one or more defined channels, go to <device>/<mixer>/Fader Channels. Select the Channel you want. In the TFT Display area on the right hand side, select a Default View.
Note
Not all TFT View Elements are available for Fader Views. See Elements & Configuration.
Master View
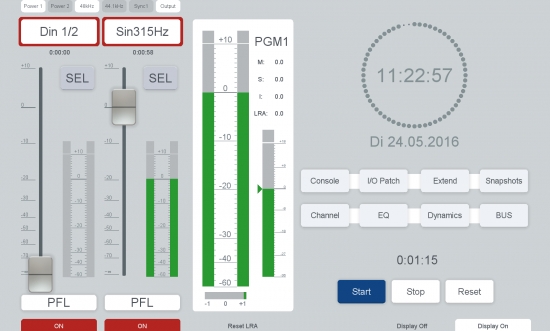
A master view can be created as required using the whole area of the TFT display. Master Views can be assigned to any TFT. Master views can also be Access Views.
To add a new Master View, in <device>/TFT Views click Add in the Available Views area. Select Add Master View (96 Keys).
A new Master View is created which has no defined size until you select a display type.
In the View Options area on the right hand side, under Preferred display type, decide which kind of display it is for.
4015 Control Viewis only kept for compatibility.4018 Control Viewhas the size of a 52-4018 TFT and can also be used for 52-4010 TFTs. 52-4010 TFTs will show the small 52-4018 View with grey borders. Use this option also for 52-1114 (52/DX) TFTs.4010 Control Viewhas the size of a 52-4010 TFT and can also be used for 52-4018 TFTs.52-4018 TFTs will only show the upper left part of the View and cut them.
To set a Master View as Default display for a specific TFT, go to <device>/<mixer>/Console. Click on the TFT you want to use for the Master View. On Module Options area, select a Default View.
Tip
If you want to change your Default View directly on the console, create a Button with Key Function Set Default View.
Important
If you have multiple master view-TFTs, you must assign different TFT Groups. If you want the TFTs to show always the same, set them to the same Display Group.
If Default Views of TFTs in the same TFT Group differ, the Firmware will not work correctly.
Access View
An Access View is always active when you set access on a channel which is in the same access Group. Access Views are always Main Views. Mostly, they are used for e.g. channel input properties.
The Access View is active as long as the access is active. To set access and access view, it is useful to create a Button with the Access Input Select function and check Set Access View. Alternatively, a Button can be created with key function Access View. As long as active, the access view is active and TFT will jump into access view when pressing access button.
Tip
Access View will be active as long als a channel is selected. If you want to have specific pages also available in Access View, make sure to have Follow Access on the Set View-Buttons checked.
View Settings
Wether you create a new Fader View or a new Master View: You have to do some configuration. The Configuration is made on the View Settings area on the right hand inside in the View Options tab.
View Name: After Creating a new view, define a distinctive name.View Group: Buttons with Key FunctionSet Viewwill check the current View Group. As long as the user stays in views with the same View Group, the Button will be enlighted (active). Useful e.g. for EQ or Dynamics-Pages with more than one View.Preferred Display Type: Choose the Display you want to create the view for. This parameter is vital for the size of the created view and the view editor. Possible configurations:- Master Views:
(None)4015 Control View4018 Control View4010 Control View
- Fader Views:
(None)4015 Fader View4018 Fader View4010 Fader View (4 Fader)4010 Fader View (5 Fader)4010 Fader View (6 Fader)
Change Scaling: Useful for upgrades from Toolbox5 to Toolbox8 views. When Upgrading, clicking16:10 Formatwill change scaling of the view from 4:3. For compatibility-view creation for old TFTs, click4:3 Formaton a 16:10 created view to rescale the elements. Clicking more than once is possible and may be useful.Background Image: Select a Background image. For more information on Resolutions and Image files, see Resource Files.