Hardware
At the beginning of each configuration, you have to set up the available hardware and I/O modules. You define which modules are used in your system and which I/O modules are connected on which port of the DSP Core.
To start the configuration, select the desired device in the project tree and then select Hardware. In the Hardware units area you find the basic hardware parts, which are required for a system, like DSP unit, power supplies or Concentrators. Click Add Unit to add all modules that are available in your system. To delete a selected module from the system, click Remove Unit.
If you add a new device in your Project tree, first always go to <Device>/Hardware and select the type of your device in the Unit Options area. To select device type, select the default entry and change the core type to the one you want to configure.
If you do not see your product, click Click here to see more modules or the menu Options/Configuration…/Product filter. Here you can set the product filters.
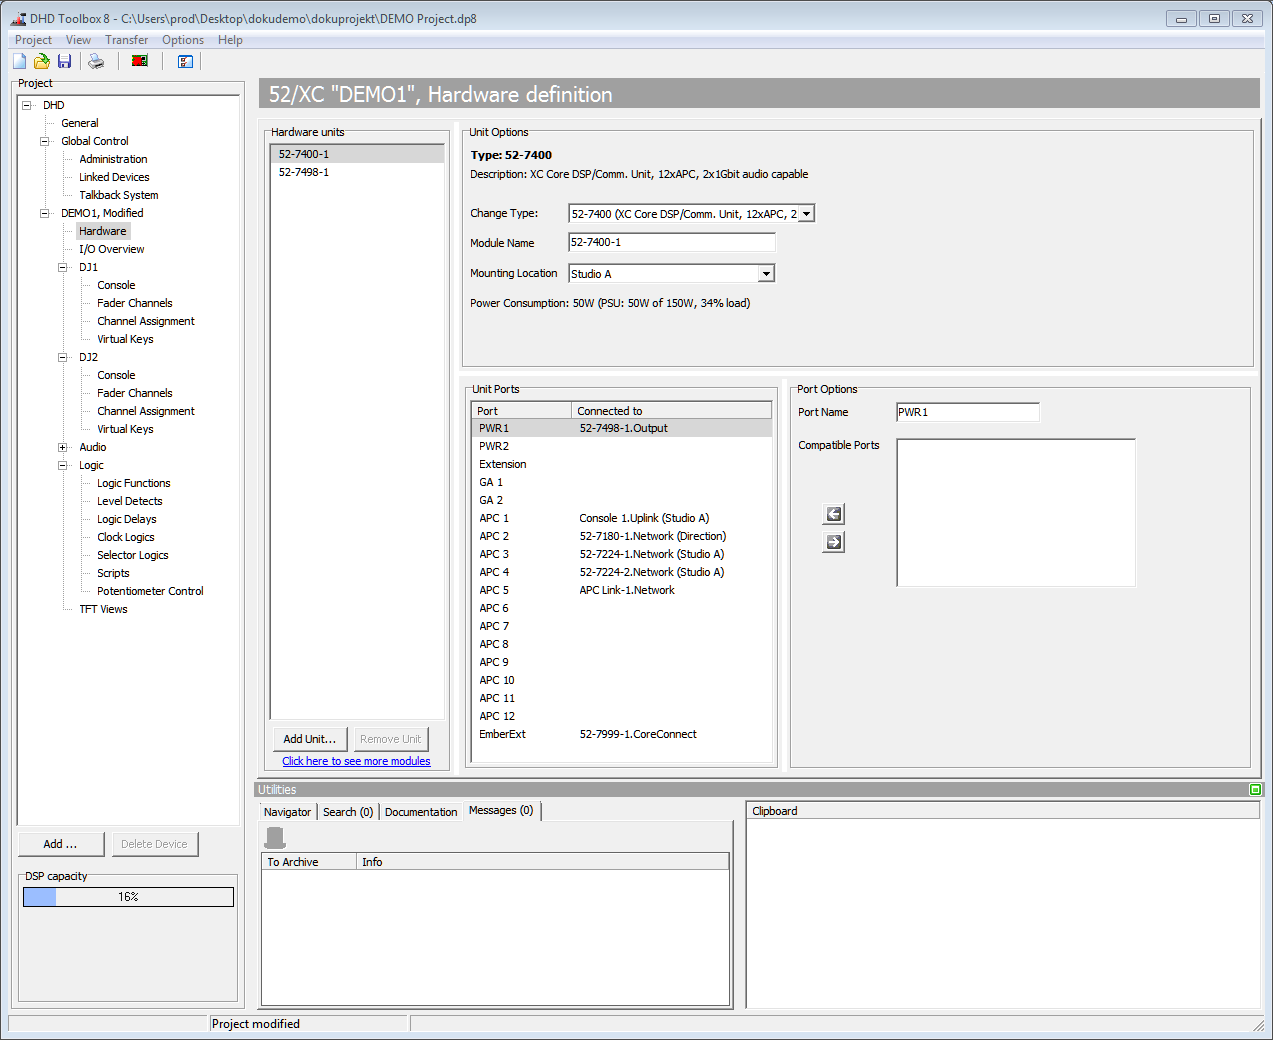
To use your own module name instead of the module number, in the Unit Options area, you can enter a distinctive name in the Module Name box. You can also enter the location of the module in the Mounting Location box. (see also global mounting location settings
In the Unit Ports area, each port of a selected module is shown. You can also find in this list the modules, that are connected to the ports.
In the Port Options area you can can change the name of each port. You can also change the connected module by selecting another module in the Connected to list.
Important
You must always connect sufficient power supply virtually. If it is not created and connected, DSP capacity will jump to 100% and tell you, that your module is not connected to sufficient power source.
Note
Connect all consoles, TFT Touch displays, I/O modules and Device Links manually to one of the APC ports in your system to get a correct hardware fitting.