Monitor Functions - Monitoring Options
On the Monitor Functions tab, you can configure the selectors of the device. You can select, which audio signal is used as a default source. After switching on the device or after a reset, the selectors point to the sources selected here. These are also enabled if no monitoring key was defined. If you press an enabled monitoring key again, the assigned source is disabled and the default source is used again.
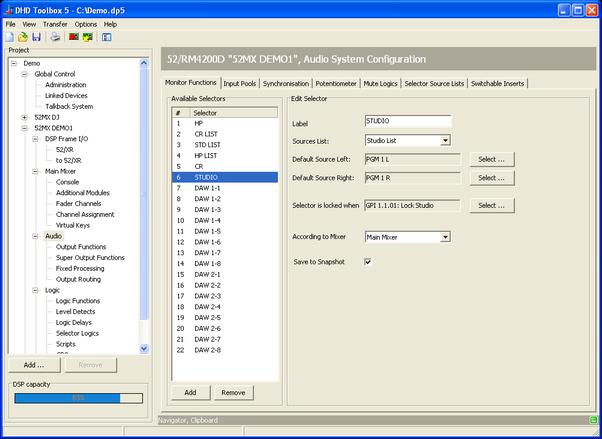
In the Available Selectors list, you can see all created selectors. Click Add to create a new selector. You can create up to 200 selectors. To delete a selector, select the desired selector in the Available Selectors list and click Remove.
Please read in the Output Functions and Output Routing sections how to link selectors and outputs.
In the Edit Selector area, you can change options for the selected selector. Available options are shown in the following table:
| option | description |
|---|---|
| Label | • After creating a selector, it has no name and is shown with the used functions as follows: Selector <#>. Enter a distinctive name in the Label box to make the identification of the different selectors easier during configuration. |
| Sources List | • You can assign a list of audio sources to each selector. Up to 10 different lists with up to 250 entries are available here. The sources for the signal lists can be assigned under <Device>/Audio, on the Selector Source Lists tab. (See also Selector Source Lists) • You can assign the 10 signal lists to the Monitor Selectors and the Output Selectors of the clean feed system as you like. (See also Mixing Functions - Configuring Internal Busses). |
| Default Source Left | • Select the left default source that is used if no monitoring key is defined. To do this, click Select, the Audio Sources window opens. Select an audio source from that window and click Assign. Alternatively, you can double-click on the audio source or drag the desired audio source on the Default Source Left box. |
| Default Source Right | • Select the right default source that is used if no monitoring key is defined. To do this, click Select , the Audio Sources window opens. Select an audio source from that window and click Assign. Alternatively, you can double-click on the audio source or drag the desired audio source on the Default Source Right box. |
| Selector is locked when | • You can select a logic source to lock the selector to prevent changes. To do this, click Select, the Logic Sources window opens. •. Select an logic source from that window and click Assign. Alternatively, you can double-click on the logic source or drag the desired logic source on the Selector is locked when box. |
| Assign to Mixer | • You can assign the selectors to virtual mixers. This way it is possible to prevent that loading a mixer snapshot on a virtual mixer overwrites the settings of selectors that are used by another virtual mixer. |
| Save to Snapshot | • Select this check box if the settings of the selector should be saved in mixer snapshots. • Please note the options Assign to Mixer and Selectors (Mixer Snapshot Options). |